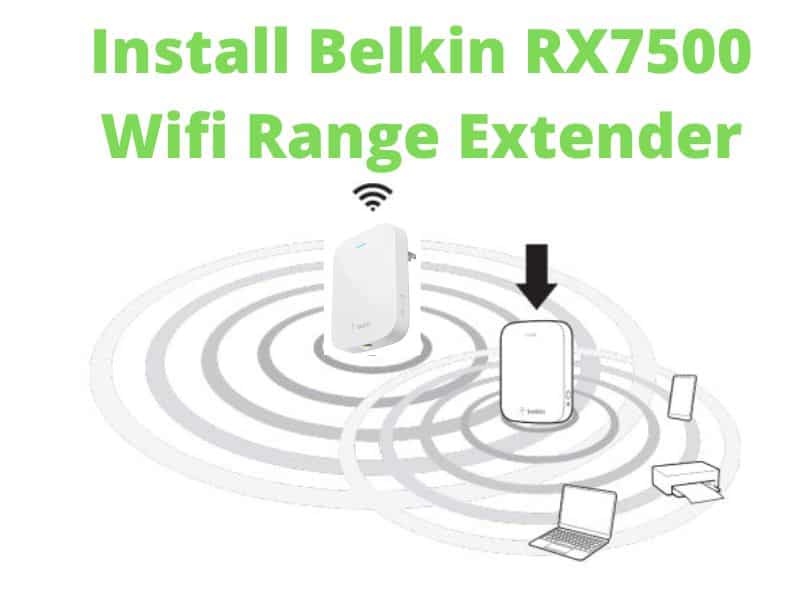
Belkin range extender can extend your wifi area in your home and office. You can install Belkin RX7500 wifi 6 range extender due to its fast speed and high coverage area. It works on dual-band and wifi 6 technology that delivers the fastest connectivity. You can stream and play games with other internet works at a time without interruption.
Belkin RX7500 range extender is easy to set up and connect with any router as well as a modem. In this article, you will find how many ways you can install your Belkin Rx7500 range extender.
Install Belkin RX7500 Wifi 6 Range Extender in Wireless Range Extender mode
How do I connect my WiFi extender to my existing WiFi? In this, you will learn to connect your extender with an existing wifi network. In this process, we will use the wifi connection to install belkin rx7500. So, you need to know your wifi name and password.
- Plug in your Belkin RX7500 range extender to the power outlet.
- Wait for the light to start flashing orange.
- Go to your computer or phone and search wifi to find range extender default network. It must be like Belkin Extender Setup – xxx, where xxx is the MAC address.
- Connect with that Belkin Extender Setup – xxx wifi. It should be without a password and open network. In case asking password then you need to reset the range extender.
- Once you are connected, open the web browser on your phone or pc.
- Type https://extender.belkin.com or https://192.168.1.1 on the address bar and hit enter.
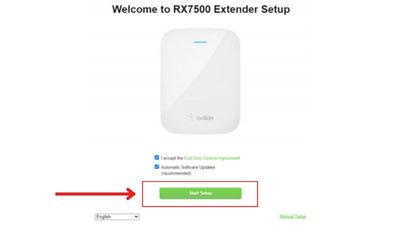
- Belkin range extender Welcome setup page will appear on the screen.
- Check mark on I accept and tap on Start Setup.
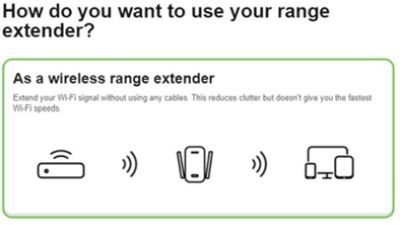
- You need to select the option As a wireless range extender and the Next.
- Now the screen will show all the wifi networks nearby you. Find your wifi network from them and click Next. Sometimes you won’t find your dual-band wifi then refresh the network.
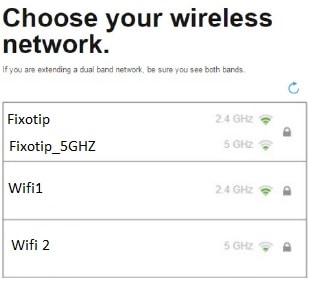
- If you do not see any of your wifi, then you can select Look for more networks… or Manually enter the network name from below.

- Next, it will ask for your existing wifi password.
- Enter the password to complete the setup.
- Before applying the settings it will show you to review the extender wifi settings.
- By default wifi name will add _EXT to differentiate your extended network from your main network.
- Now you will prompt to the Spot finder screen. Here you need to place the extender in the right place.
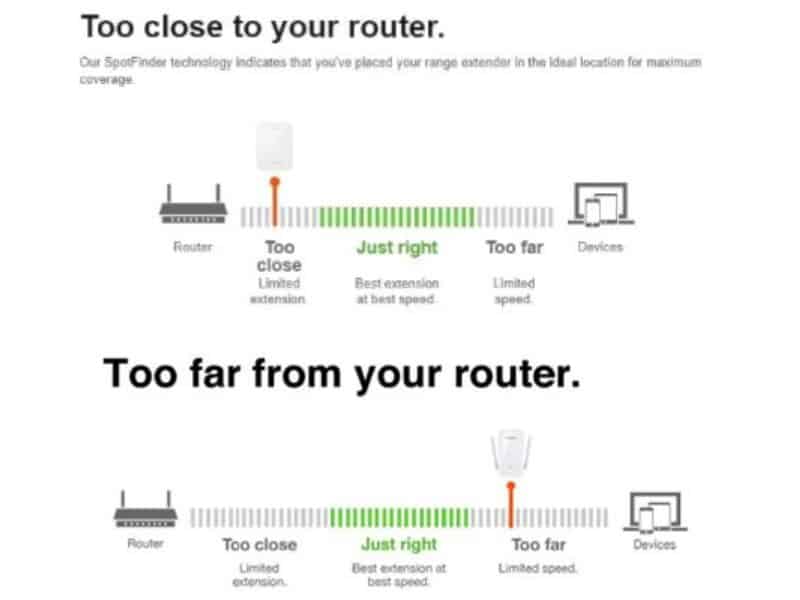
- Next, create an admin and password for your Belkin rx7500 range extender.
- Further, you need to register your product next for the belkin support service.
Now, your range extender is ready to use.
Set Up Belkin RX7500 Range Extender Using WPS
You can install belkin rx7500 using wifi protected setup( WPS ) feature. To do it your existing router should have wps feature and turn it on.
- Plug in the range extender to the power outlet that is near the router.
- Wait for the light to turn orange on the belkin range extender.
- Press and hold the WPS button on your wifi router.
- Now, press and hold the WPS button on the side panel of your rx7500 range extender.
- When the WPS buttons of both devices are pressed, they will start pairing. The light on this time range extender will flash blue.
- Paring will be completed when the light turns solid blue.
- Solid orange light state WPS pairing has failed.
Manually Setting Up Belkin RX7500 Range Extender
To do manual setup Belkin RX7500, skip the wizard setup. You have to manually log in and enter your network credential into the extender.
- Power on your Belkin rx7500 range extender.
- Connect your laptop or phone with the range extender using the wifi network.
- Search the wifi name on your laptop to find the default SSID for the range extender is Belkin Extender Setup – xxx.
- xxx is the MAC address of the range extender written on the back of it.
- Click on the Manual Setup link and skip the Setup Wizard.
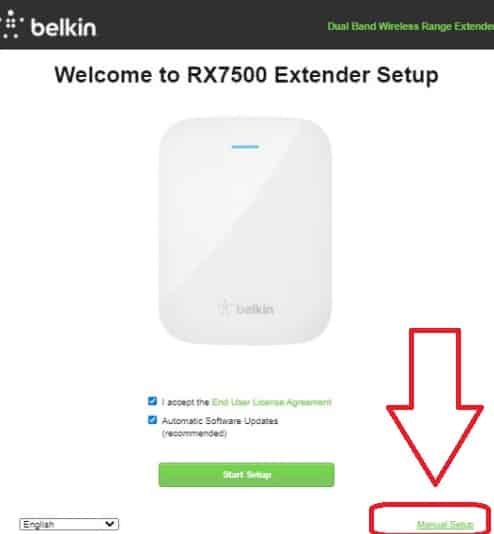
- Type admin as the default password and log in.
- Select the operation mode for your network as Wireless Range Extender.
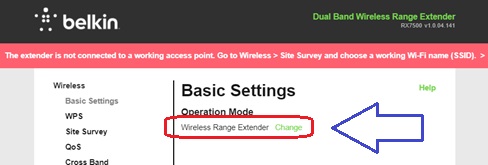
- Tap on Site Survey from the left menu.
- A display of some wireless network will show on the screen.
- Tap on your wifi network and it will ask for the wifi password.
- Enter your existing wifi password and connect it.
- The range extender light will turn solid blue after the connection.
Your range extender has been configured and you can connect other devices with it. Range extender wifi name will prompt by EXT.
Install Belkin RX7500 Range Extender Using Setup CD
You need a computer as well as LAN cable to install range extender using setup cd. Follow the instructions below to set up the belkin range extender using the setup CD.
- Connect Belkin range extender LAN port with the computer LAN port using LAN cable.
- Turn on your range extender.
- Disable the wifi of your computer.
- Open the web browser on your PC and type https://extender.belkin.com then press enter.
- The screen will prompt you to ask for the password. Use admin and press Login.
- Choose the working mode as Wireless Range Extender.
- Click on Site survey from the left side menu. It will scan the available wifi network.
- After scanning you will get a list of available wifi.
- tap on your wifi and enter the wifi password.
- Your extender is now connected to a new wifi network.
- Unplug the LAN cable from your computer.
Place your range extender where you have a low signal. It will extend the wifi signal by adding EXT into the same wifi name. Use the same wifi password to connect with range extender wifi.
Install Belkin RX7500 as a Wired Range Extender (Access Point)
Imagine you want to install the range extender where the wifi signal of the router is not reaching. Like you have two houses and you have to run the same wifi in both houses. But the signal of your router is not going to the other house.
In that case, you can use the Belkin range extender wired connection to establish the wifi network. Follow the instructions to install the belkin range extender where the router’s wifi signal is not available.
- Connect a long LAN cable between Router’s LAN port to the Belkin RX7500 WAN port.
- Plug in the extender to the power outlet and wait for the light.
- When the light turns green further proceed for installation.
- Go to your laptop and search wifi network by the name Belkin Extender Setup – xxx. It is the default SSID of the belkin range extender, where xxx is its MAC address of it.
- Click on connect to connect wirelessly with the range extender. There is no password required because it’s open wifi.
- Once it’s connected go to your laptop and open a web browser.
- Type https://extender.belkin.com or 192.168.1.1 in the address bar and press enter.
- It will ask you to log in. Type admin as password and login to belkin range extender setup.
- Tap on the Start Setup button.
- Select operation mode to As a wired range extender (Access point) option and click Next.
- Enter the wifi name and password for your extended network. Fill in the information for both 2.4 as well as 5 GHz wifi extended network.
- Further, create an admin password for the range extender.
- Next register your Belkin RX7500 range extender.

Further, your extender has been configured and is ready to use as an Access point.
FAQ
What does light mean on Belkin RX7500 Range Extender?
However, there are multiple meanings for the lights on the belkin rx7500 range extender. Find below the list and their purpose:
Blinking Blue light on Bekin RX7500 Range extender:
- Starting up range extender.
- Resetting to factory defaults.
- Upgrading firmware.
Blinking Orange light on Bekin RX7500 Range extender:
- Not connected to the router or other error.
- Connected to the router but not the internet.
Solid orange light on Bekin RX7500 Range extender: Weak connection with the router. Move the extender towards the router network.
The solid blue light on the Bekin RX7500 Range extender: Ready to use.
